
Welcome!
I am not new to blogging, as this is actually the 5th one I've ever done. I don't really blog much anymore on the others, except for our private family blog that is more like a baby book for each of my children. My other blogs are based around a specific topic, therefore I don't feel like any of them is really a place to start blogging about our new adventure. My goal on this blog is to document all the fun we are having at the moment...whether it's trying a new recipe or DIY project I've found off Pinterest or having fun in the homeschool classroom. I also plan on sharing about more meaningful topics, such as what the Lord is teaching me about things as well as sweet parenting moments. I don't claim to be an expert in any of this, so I'm just going to keep it real here. I hope you will join me!
PS: All previous posts (below) are imported from one of my other blogs.
Monday, July 9, 2012
Friday, June 15, 2012
Porch Update
So last July I posted in one of my other blogs about wanting to do a project for my back porch. Find the post here. My goals were that it would be very wallet-friendly and add some privacy as well as some personality to a somewhat large and empty space.
As you might already know, fabric is expensive! But especially outdoor fabric! And I had many feet of windows I needed to cover. So in order to keep my costs low on the curtains, I went with already made shower curtains that I chose specifically so that it wouldn't look like...a shower curtain. So my curtains are made from a neutral goldish-tan, plain fabric that I hemmed to the proper length for my window openings. I found them for under $9 each at Big Lots (they are the Better Homes and Gardens brand. Not too bad!) The nice part is, they already had buttonholes at the top for me to add rings. I found spring-loaded curtain holders and curtain rings (I went with plain silver) at Big Lots as well, for less than $5 each.
I found some REALLY cheap fabric that coordinated and made some large curtain ties that hold two curtains together for maximum light. From the leftover fabric, I made a table cloth and a coordinating pillow for my chaise lounge.
All for under $100. Pretty good!
The "after" photos:


New top...for me!
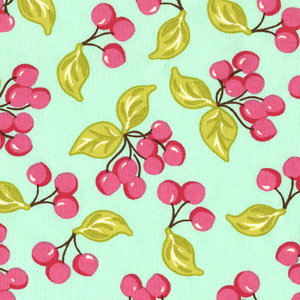
I made this top for myself (from Simplicity #2892) and I really love it! The fabric is from the Amy Butler Daisy Chain collection. The second picture shows the "bib" detail...lots of gathering and a small ruffle at the neckline. Hard to see it in the photo, though.


New Dress
It's been awhile, but my Princess finally got a new dress! It's a different take on a pillowcase dress.
I angled the sides a bit, and then added a small ruffle near the bottom hem. The dress ties at one shoulder with a bow made from matching fabric. She loves it!

I angled the sides a bit, and then added a small ruffle near the bottom hem. The dress ties at one shoulder with a bow made from matching fabric. She loves it!

Wednesday, April 11, 2012
Bedroom Makeover
A couple of months ago, I finally got around to making over my Princess' bedroom from a toddler-looking room to a big girl room. A double bed is now in place of a twin bed. I switched to white furniture instead of natural wood color. And of course, I sewed all of the pillows, curtains, tableskirt, bedskirt, etc.
I found the head board, which is very Pottery Barn-ish, in bad shape at a thrift store for $5! I sanded it, replaced some of the wood spindles, and spray painted it white and it's as good as new.
This room is the hottest in the house during the summer, so I had to line her curtains with black-out fabric to reduce the light and heat coming in the windows. iI couldn't find a pattern I just loved, so I did it without any pattern and it turned out perfect, much to my surprise! The curtains are full-length roman shades with pom-poms at the bottom and large ties for detail.
Here are the fabrics I used, some from Fabric dot com and others from Custom Baby Boutique dot com.


Unfortunately, I did not take "before" shots, but here are the after shots!
I found the head board, which is very Pottery Barn-ish, in bad shape at a thrift store for $5! I sanded it, replaced some of the wood spindles, and spray painted it white and it's as good as new.
This room is the hottest in the house during the summer, so I had to line her curtains with black-out fabric to reduce the light and heat coming in the windows. iI couldn't find a pattern I just loved, so I did it without any pattern and it turned out perfect, much to my surprise! The curtains are full-length roman shades with pom-poms at the bottom and large ties for detail.
Here are the fabrics I used, some from Fabric dot com and others from Custom Baby Boutique dot com.

Unfortunately, I did not take "before" shots, but here are the after shots!
 |
| new curtains |
 |
| new pillows |
 |
| monogrammed pillow and table topper |
 |
| new places for photos on the wall |
 |
| happens to match her princess castle rug perfectly! |
Thursday, July 28, 2011
Project: Back Porch
Living in a hot climate, I sure do love having a back porch. It's just too hot to go out in the sun for at least two months of the year. My kids love to play out there, and in the spring and fall, I especially love to entertain outdoors. However, I've been wanting to make our back porch more of a cozy living space rather than a boring place to sit in the shade. I've also wanted to add something for privacy, without adding curtains or blinds on the inside of our house. So i'm starting a DIY project to spruce up our back porch on a very strict budget: keeping it around $100.
Here's the before pictures:


Here's the before pictures:


Latest Baby Items
Lots of my friends are having babies, so I'm staying pretty busy just making gifts for them right now! Here are a few of the latest baby items I've made in the past few weeks:


This last burp cloth, for Grace, I added "taggie"-type ribbon at the bottom to double as spit-up-catcher as well as entertainment for baby. :)


This last burp cloth, for Grace, I added "taggie"-type ribbon at the bottom to double as spit-up-catcher as well as entertainment for baby. :)
Subscribe to:
Posts (Atom)
